Threaded Comments Migration - Admin Guide
Threaded Comments Migration - Admin Guide
Migration of threaded comment structure from Jira Data Center to Jira Cloud.
Part 1: Data Center (Prepare Export)
Prerequisites
- Threaded Comments plugin v2.0.5 installed on Data Center
- Jira admin access on DC instance
Step 1: Download Migration Script
Download the migration script archive:
https://docs.votazz.co/downloads/threaded-comments-migration.sh.zip
Unzip and make executable:
unzip threaded-comments-migration.sh.zip
chmod +x threaded-comments-migration.sh
Note: The script can be run from any Mac/Linux computer that has network access to your Jira DC URL. It does not need to be on the Jira server itself. Windows users need WSL (Windows Subsystem for Linux).
Step 2: Run Migration Script
Run the interactive migration script:
./threaded-comments-migration.sh
The script provides the following options:

| Option | Description |
|---|---|
| 1) Add Markers | Adds :::VOTAZZ_MIG:commentId::: markers to all threaded comments |
| 2) Export JSONs | Exports two JSON files: comment hierarchy and issue ID mapping |
| 3) Remove Markers | Removes markers from comments (run after migration is complete) |
| 4) Exit | Exit the script |
Step 3: Add Markers
Select option 1) Add Markers. The script will add migration markers to all threaded comments on the DC instance. This is required so that Cloud can match comments after JCMA migration.
After markers are added, comments will look like this:

The marker format is :::VOTAZZ_MIG:<commentId>::: appended to the comment body. These markers are used by the Cloud migration tool to identify and match comments.
Step 4: Run JCMA Migration
After markers are added, run the standard Jira Cloud Migration Assistant (JCMA) to migrate your Jira instance from DC to Cloud. The markers will be preserved in comment bodies during JCMA migration.
Step 5: Export JSON Files
After JCMA migration is complete, go back to the DC instance and select option 2) Export JSONs. The script will generate two files:
1. Comment hierarchy export (comments_hierarchy_export.json):
[
  {"issueId": 11688, "commentId": 326454, "parentCommentId": 326446},
  {"issueId": 11688, "commentId": 326456, "parentCommentId": 326447}
]
2. Issue ID mapping export (issues_mapping_export.json):
{
  "11688": "TC2026D-1",
  "11682": "TC2026D-3",
  "11684": "TC2026D-7"
}
These two files will be uploaded to the Cloud migration tool in Part 2.
Part 2: Jira Cloud (Run Migration)
Prerequisites
- JCMA migration completed (all issues and comments are in Cloud)
- Threaded Comments Cloud app v5.0.0+ installed
- Two JSON export files from Part 1
- Jira admin access on Cloud instance
How to Access Migration Admin Page
- Open your Jira Cloud site (e.g.,
https://your-site.atlassian.net) - Click Settings (gear icon in top right corner)
- Go to Apps section in the left sidebar
- Under "Apps" subsection, click "Threaded Comments Migration"
Direct URL:
https://your-site.atlassian.net/jira/marketplace/manage-apps
Then in left sidebar: Apps > Threaded Comments Migration
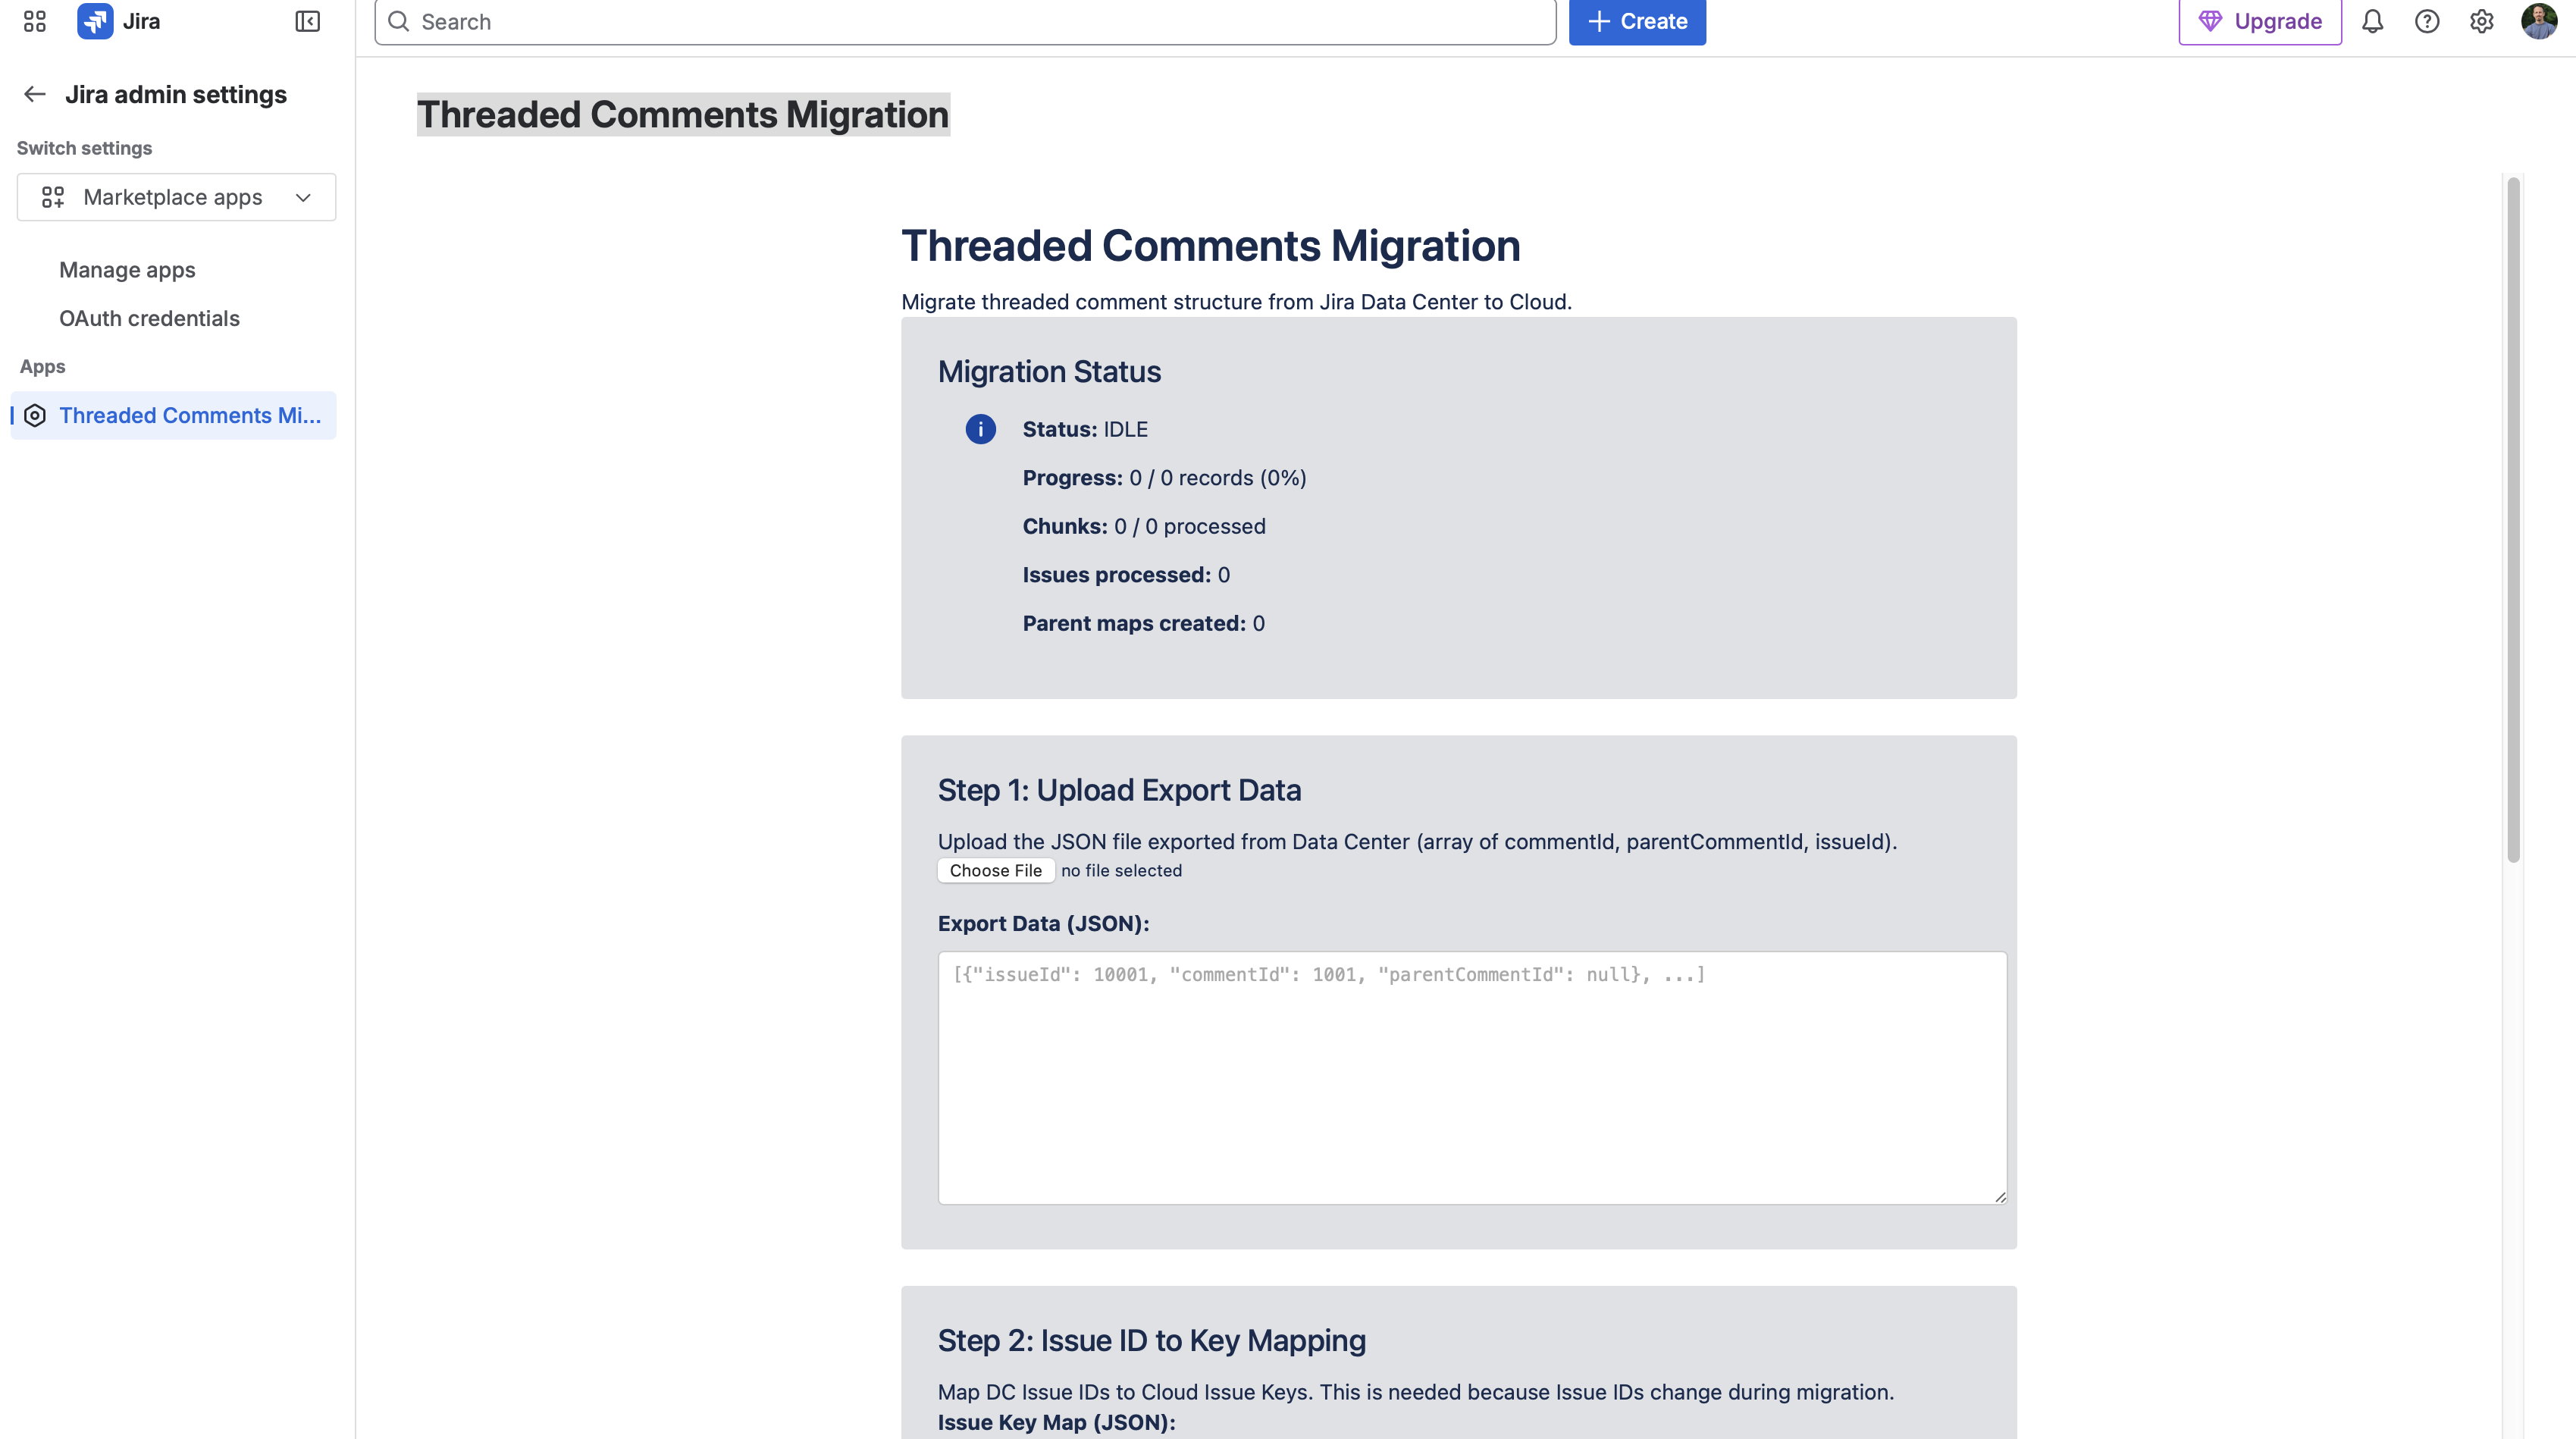
The admin page has two tabs:
- Backup & Restore -- backup and restore threaded comment data
- DC -> Cloud Migration -- migrate thread structure from Data Center
Select the "DC -> Cloud Migration" tab to proceed.
Verify Markers in Cloud
After JCMA migration, comments in Cloud will contain the migration markers from DC. You can verify this by opening any issue with threaded comments:
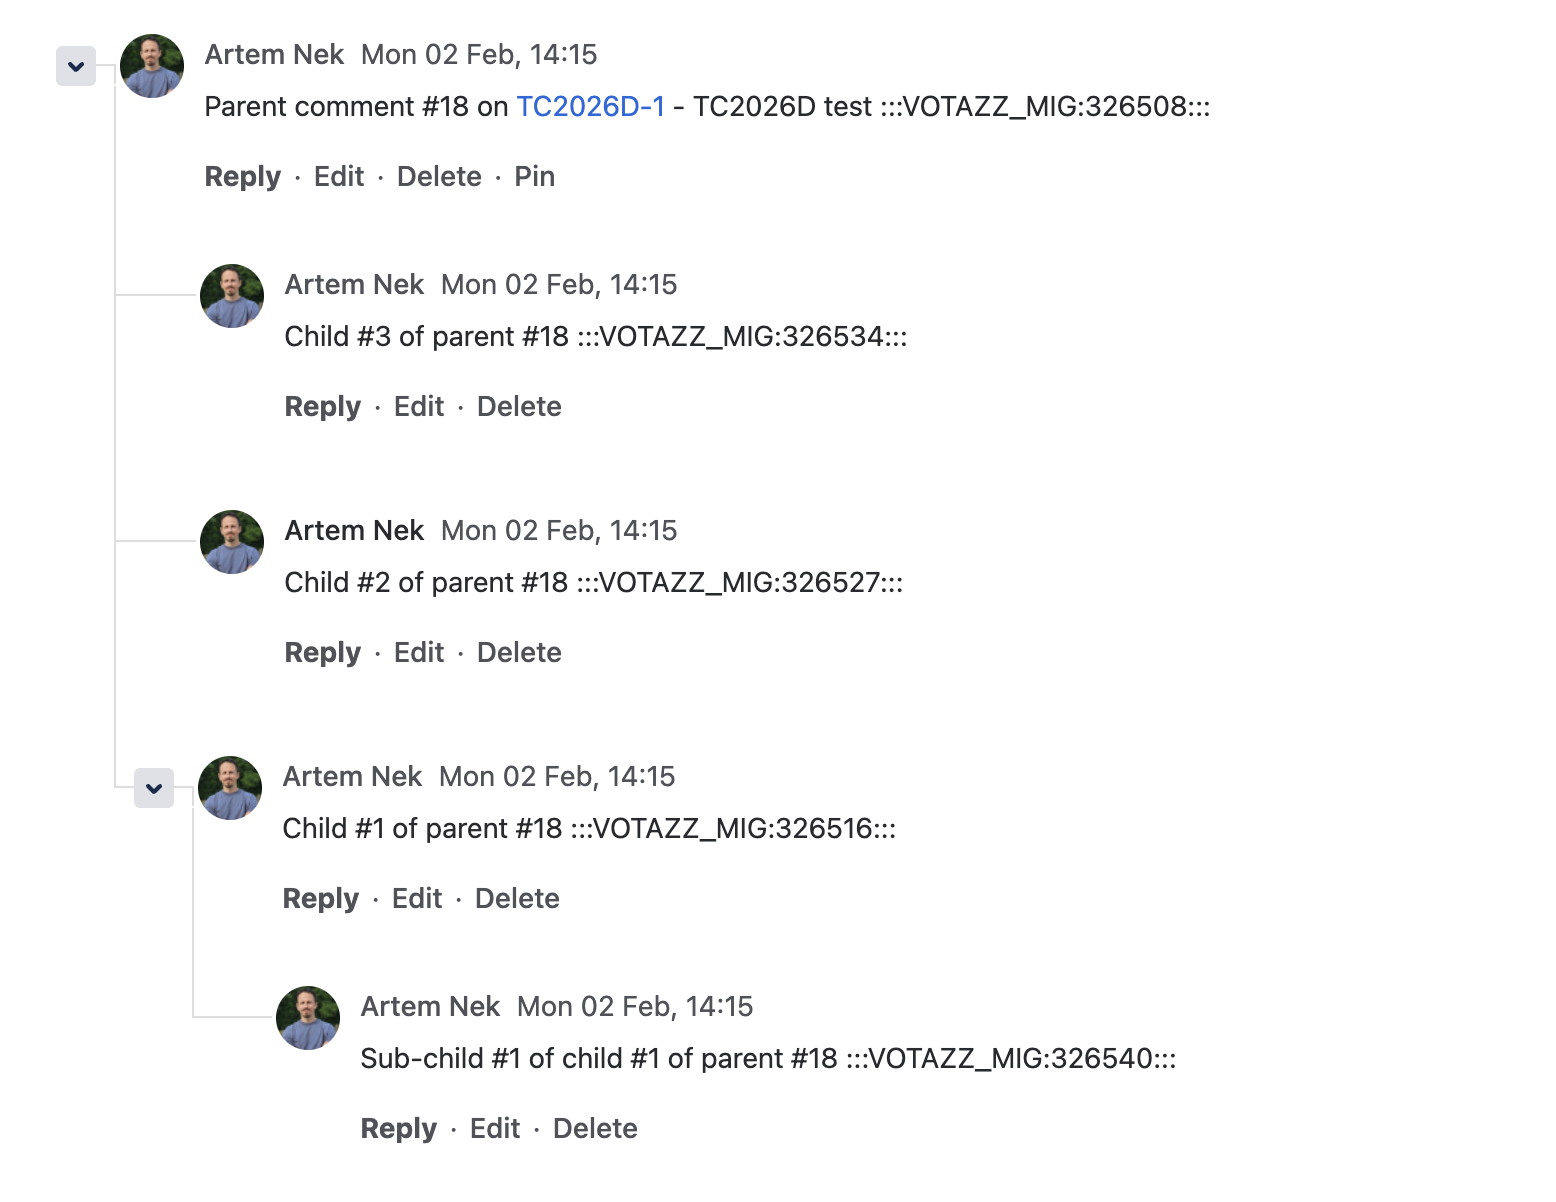
The :::VOTAZZ_MIG:commentId::: markers are visible at the end of each comment body. These will be used by the migration tool to match comments and will be removed in Step 5.
Step 1: Upload Export Data
Upload the comment hierarchy JSON file (comments_hierarchy_export.json) exported from DC.
Click "Choose file" and select the file, or paste the JSON content into the text area.
Step 2: Upload Issue ID to Key Mapping
Upload the issue mapping JSON file (issues_mapping_export.json) exported from DC.
Click "Choose file" and select the file, or paste the JSON content into the text area.
After both files are uploaded, the page will show the data:

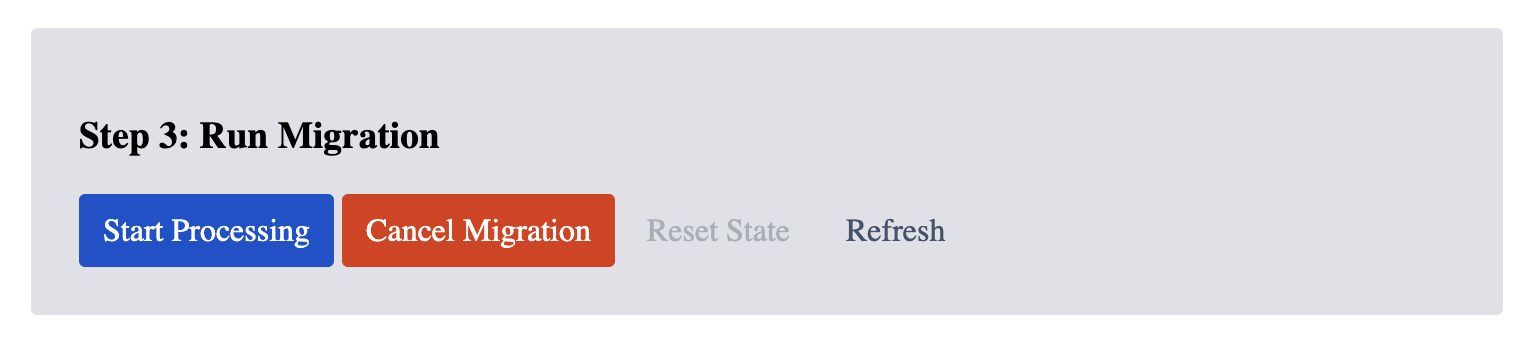
Step 3: Run Migration
Phase 1: Upload Data
Click "Upload Data" to save both JSON files to Forge Storage. For large datasets, the data is uploaded in chunks with progress indication.

Phase 2: Start Processing
After upload completes, click "Start Processing" to begin migration. The tool will:
- Read each issue's comments from Jira Cloud API
- Find
:::VOTAZZ_MIG:commentId:::markers in comment bodies - Match DC comment IDs to Cloud comment IDs using the markers
- Restore parent-child thread relationships in per-issue storage
Important: Keep the browser tab open during processing. Progress updates in real-time. If the tab is closed or the browser goes to sleep, you can return to this page and click "Continue Processing" to resume from where it left off.
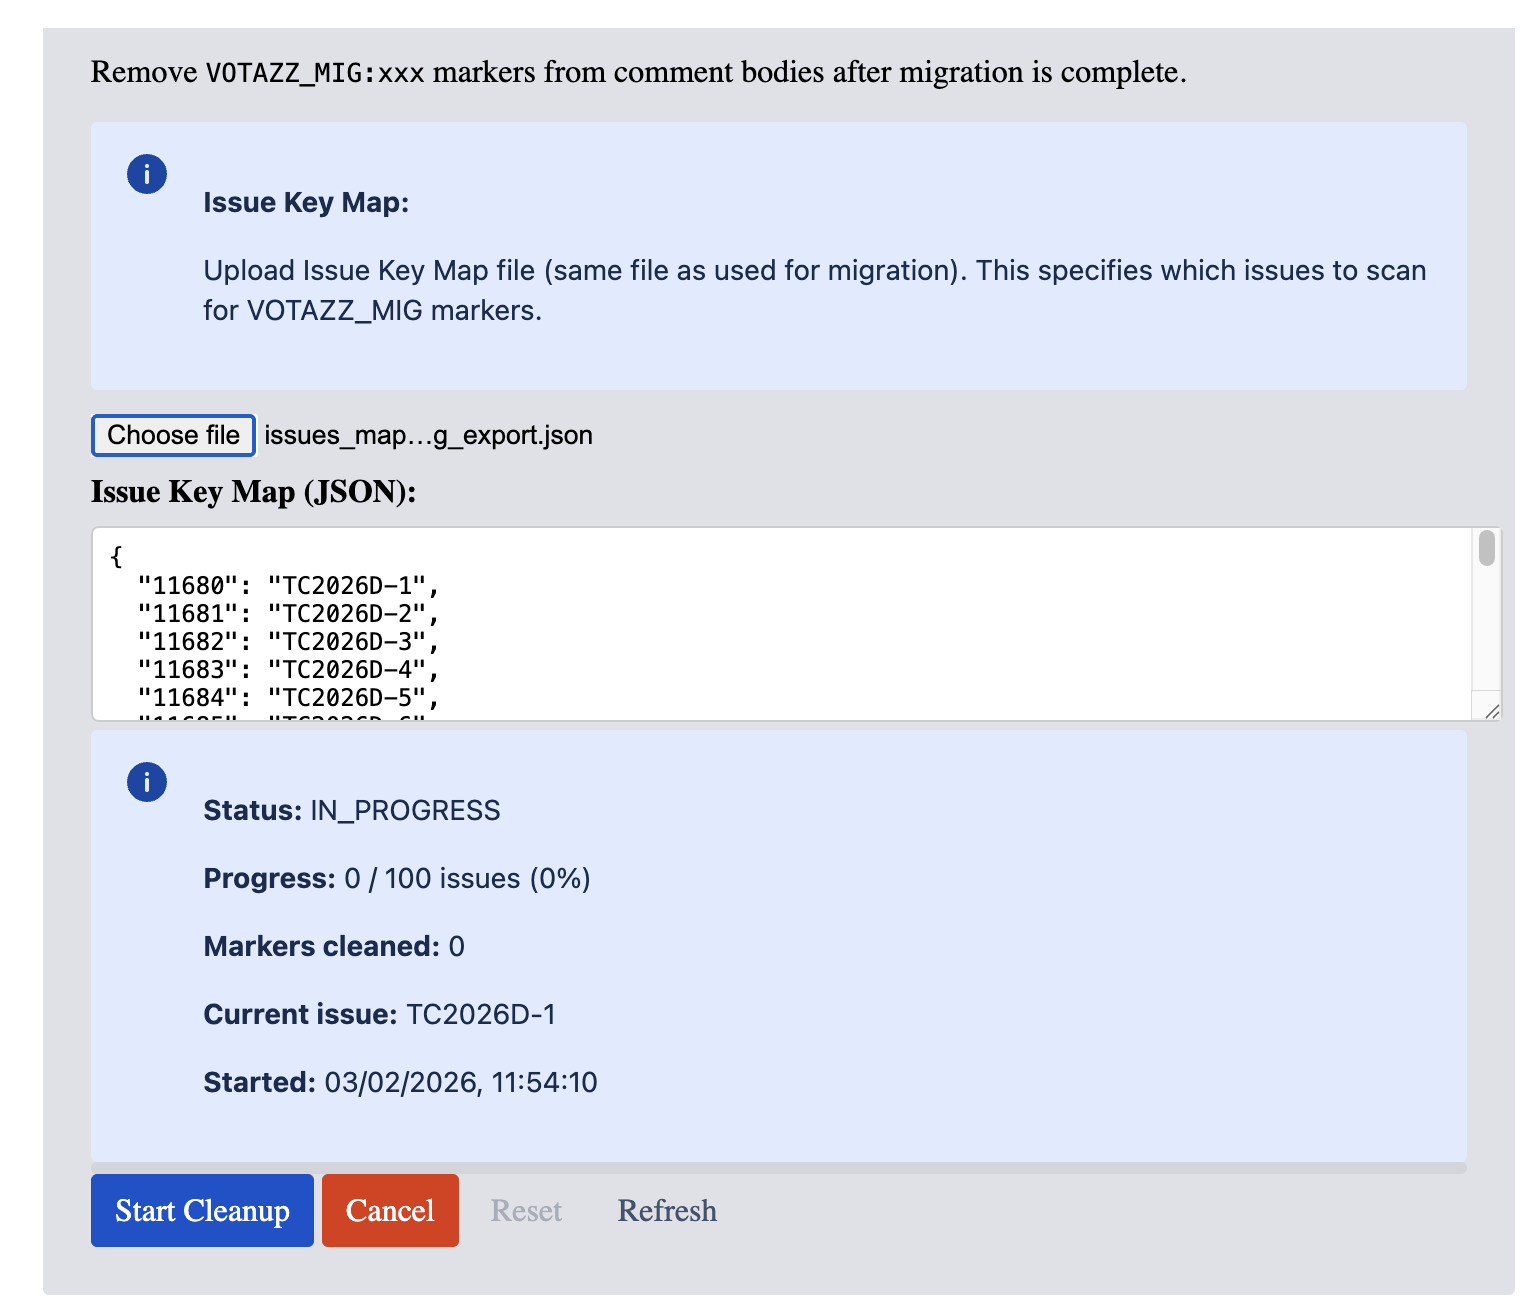
Step 4: Cleanup Markers on Cloud
After migration is complete, remove the :::VOTAZZ_MIG:xxx::: markers from Cloud comment bodies.
In the "Step 4: Cleanup Markers" section, upload the same Issue Key Map file used for migration. This tells the cleanup tool which issues to scan.
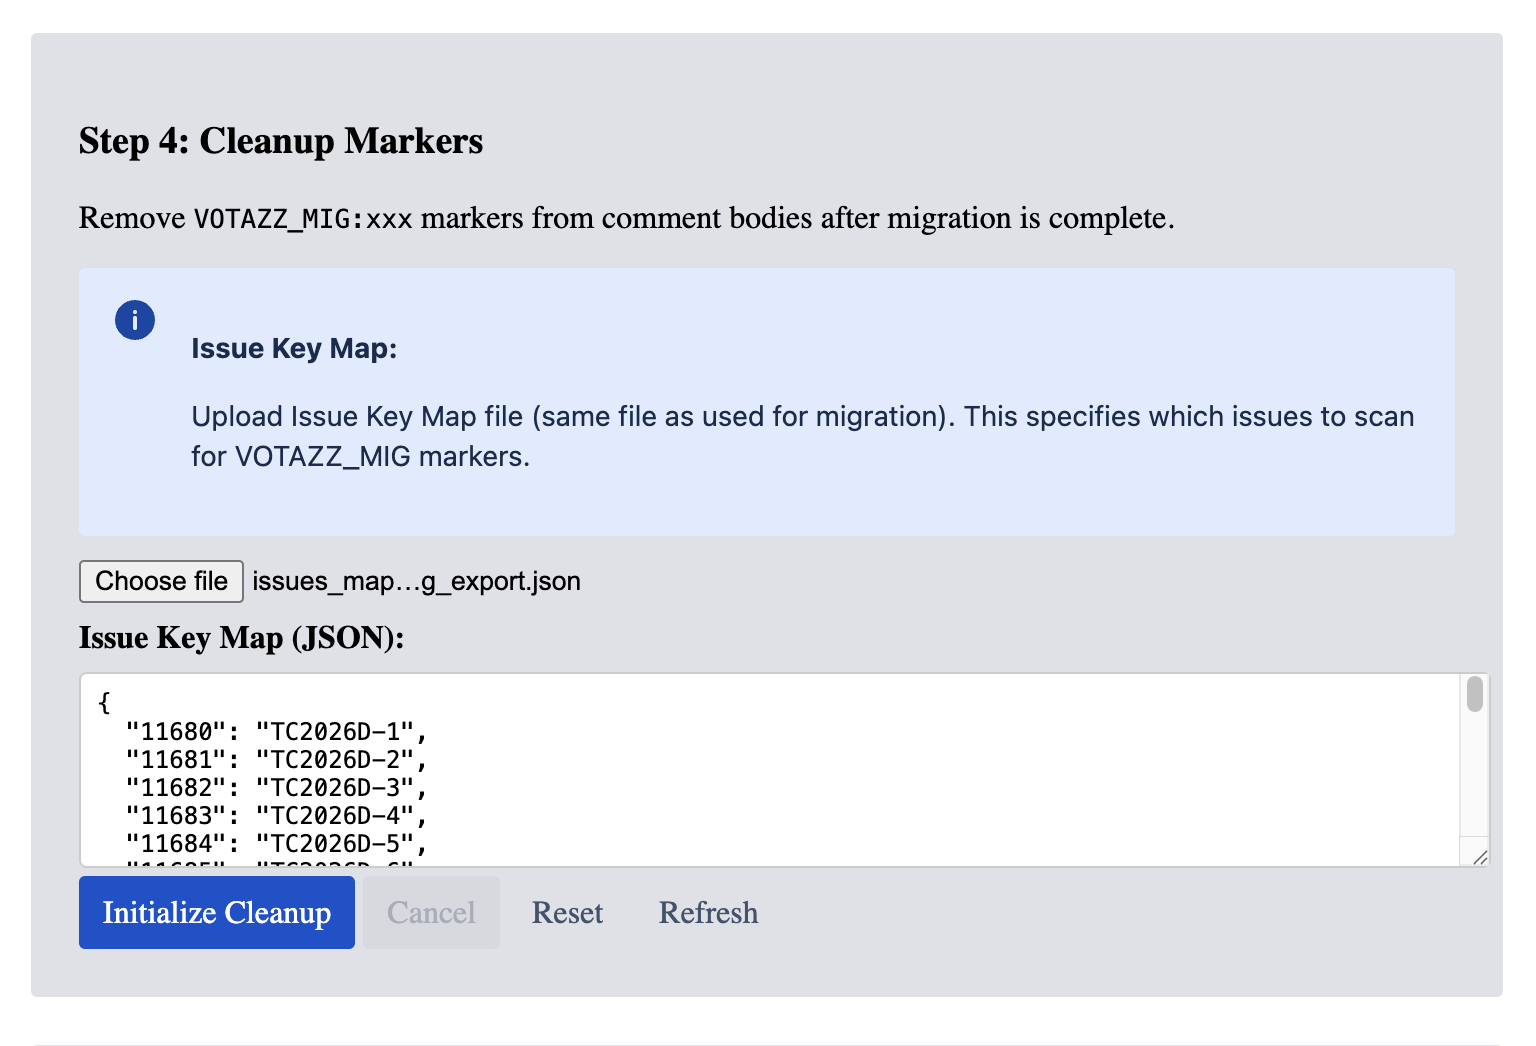
Click "Initialize Cleanup" to prepare the cleanup job, then "Start Cleanup" to begin.
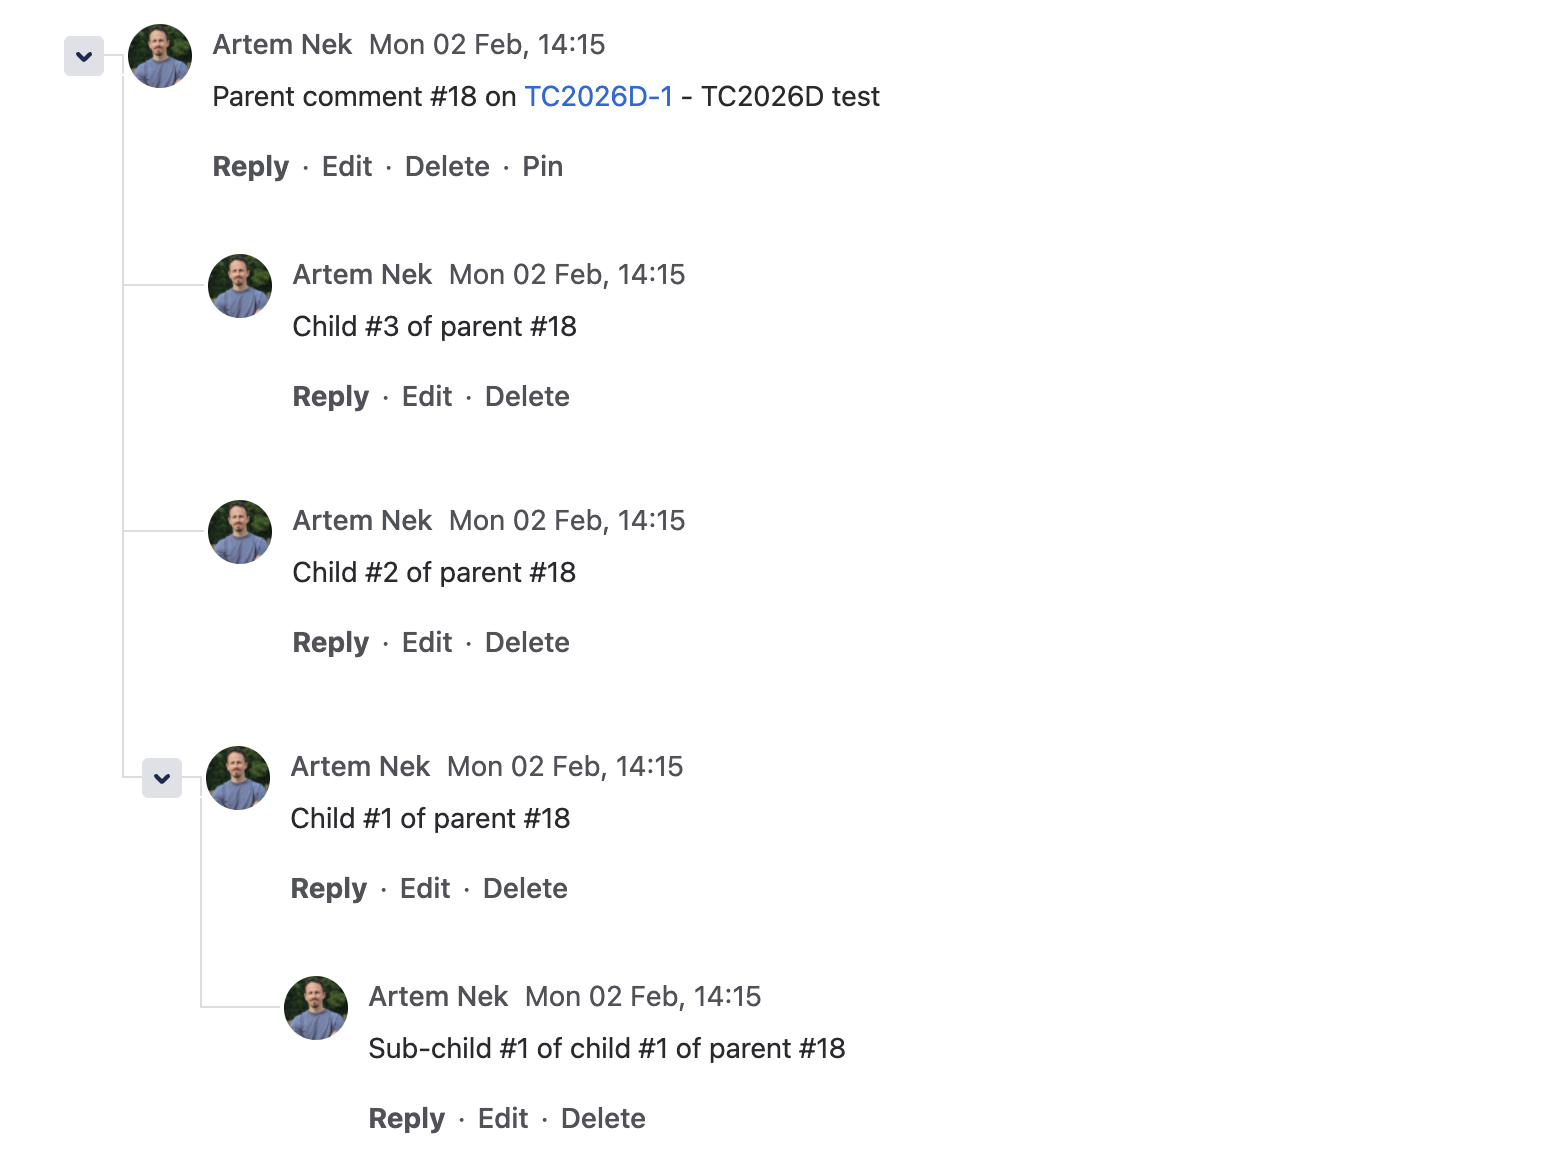
The cleanup process scans each issue's comments and removes the marker text. After cleanup, comments will appear clean:
Step 5: Remove Markers on DC (Optional)
After Cloud migration and cleanup are complete, go back to the DC instance and run the migration script option 3) Remove Markers to clean up the markers from DC comments.
Migration Status Fields
| Field | Description |
|---|---|
| Status | IDLE / IN_PROGRESS / COMPLETED / FAILED / CANCELLED |
| Progress | X / Y records (Z%) |
| Chunks | X / Y processed |
| Issues processed | Number of unique issues processed |
| Parent maps created | Number of thread relationships restored |
Button Reference
| Button | Description |
|---|---|
| Upload Data | Uploads export JSON and issue mapping to Cloud storage |
| Start Processing | Begins processing uploaded data, creating thread relationships |
| Continue Processing | Resumes paused or interrupted migration |
| Stop Processing | Pauses migration (can resume later) |
| Cancel Migration | Cancels migration (must Reset before starting new) |
| Reset State | Clears all migration data, allows starting fresh |
| Initialize Cleanup | Prepares the marker cleanup job |
| Start Cleanup | Begins removing VOTAZZ_MIG markers from comments |
Preventing Interruptions
For large migrations, keep the browser tab active to prevent interruptions:
- Keep tab visible -- don't minimize or switch to other tabs for long periods
- Disable sleep mode -- prevent laptop/computer from going to sleep
- Disable screen lock -- turn off auto-lock during migration
- Use power adapter -- ensure laptop is plugged in (battery saver may throttle browser)
Browser-specific tips:
- Chrome/Edge:
chrome://flags/#calculate-native-win-occlusion-> Disabled - Firefox:
about:config->dom.min_background_timeout_value-> 1000 - Safari: No workaround, keep tab in foreground
If migration is interrupted, your progress is saved. Return to this page and click "Continue Processing" to resume.
Troubleshooting
App not visible in Apps menu
- Ensure you have Jira Admin permissions
- Try refreshing the page
- Check that app is installed: Manage apps > find "Threaded Comments"
Processing stuck
- If stuck for more than 5 minutes, the system will auto-recover
- You can click "Stop Processing" and then "Continue Processing" to resume
- If that doesn't help, click "Cancel Migration" then "Reset State" to start fresh
Errors during processing
- Check the Errors section below the Migration Status
- Permanent errors (data issues): invalid Issue Key, comment already deleted -- these won't be fixed by retrying
- Retryable errors (API/network issues): rate limits, timeouts -- these may resolve on retry
Rate limiting
- The migration tool automatically handles Jira API rate limits
- If you see "Rate limit reached" messages, the tool will wait and retry automatically
- After 10 consecutive rate limit errors, processing stops -- wait a few minutes and click "Continue Processing"
Migration interrupted
- If you close the browser tab or your laptop goes to sleep, the migration pauses
- Return to the admin page and click "Continue Processing" to resume from where it left off
- Already migrated data is preserved
Need help? Contact the Votazz Support Team.